4.Xiaozhi AI Setup
Use this page to configure the Xiaozhi backend, customize the assistant role, and use the local flashing workflow when the online flasher is not available.
This project is based on xiaozhi-esp32. If you want to add your own features, continue with secondary development after the standard setup path is working.
Backend Setup
Register a Xiaozhi Account
Note
Xiaozhi account registration may require a phone number and SMS verification.
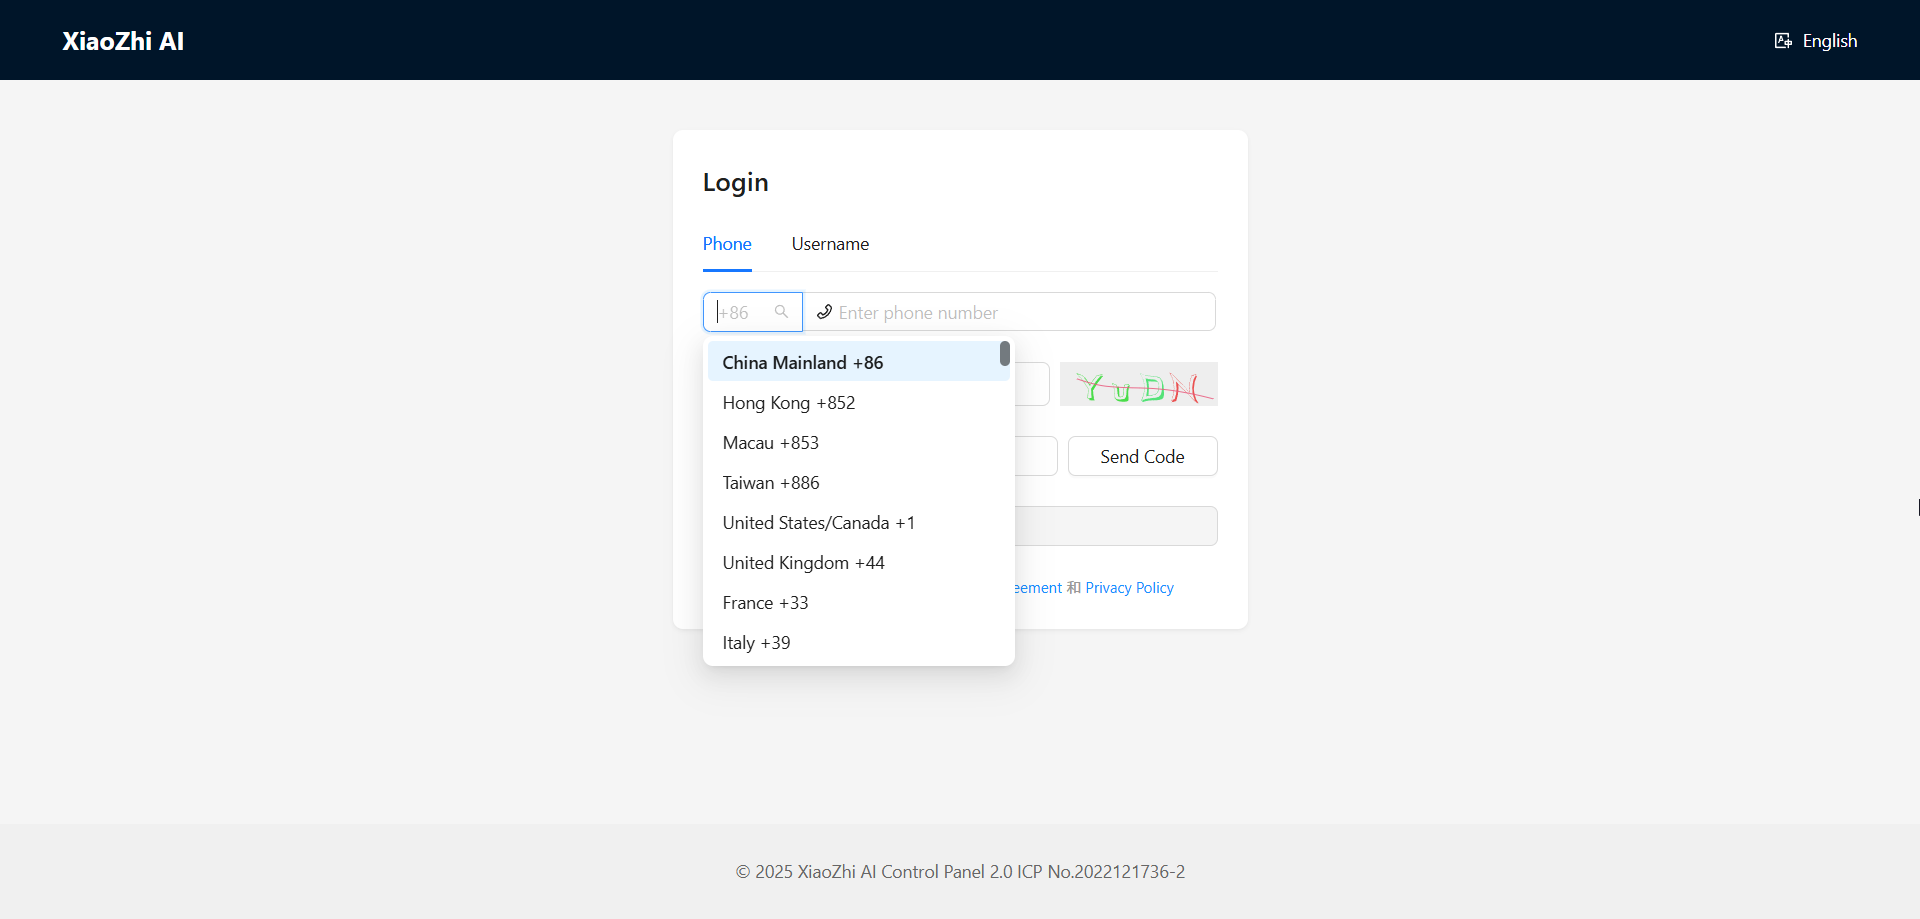
Visit the AI Chatbot Management System: Xiaozhi.me
Click
Consoleto enter the management backend.Fill in the registration form:
Select your country or region.
Enter the phone number that will receive the verification code.
Complete the captcha.
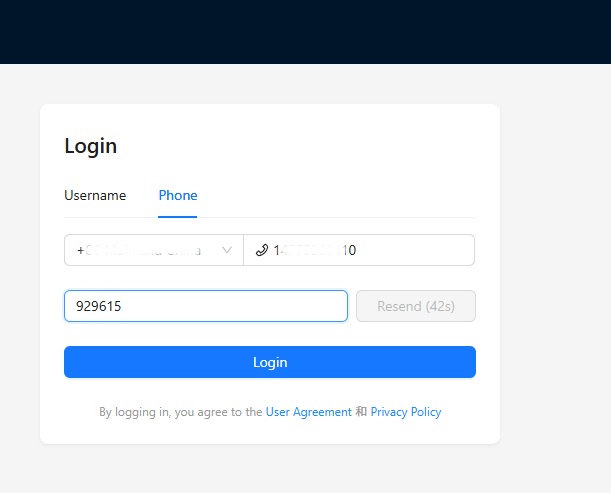
Click
Send Codeand enter the SMS verification code to complete registration.After registration, set a password in account management if you want to sign in again later from a different device.
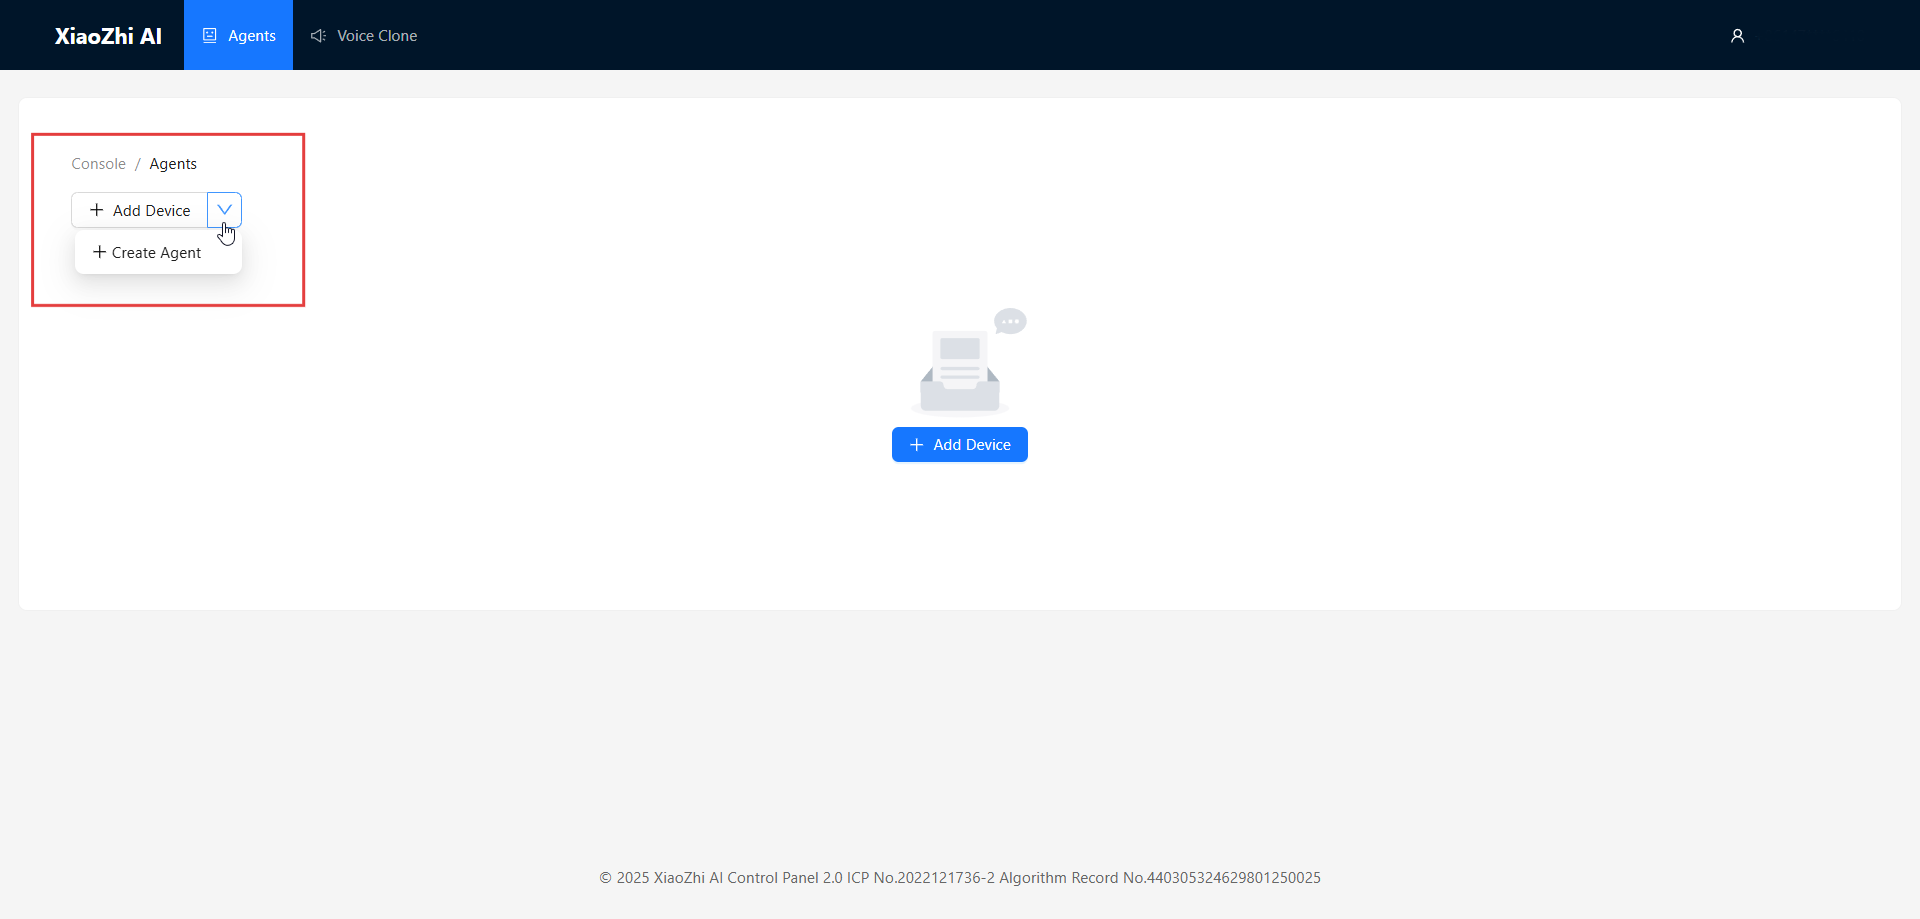
Create an Agent
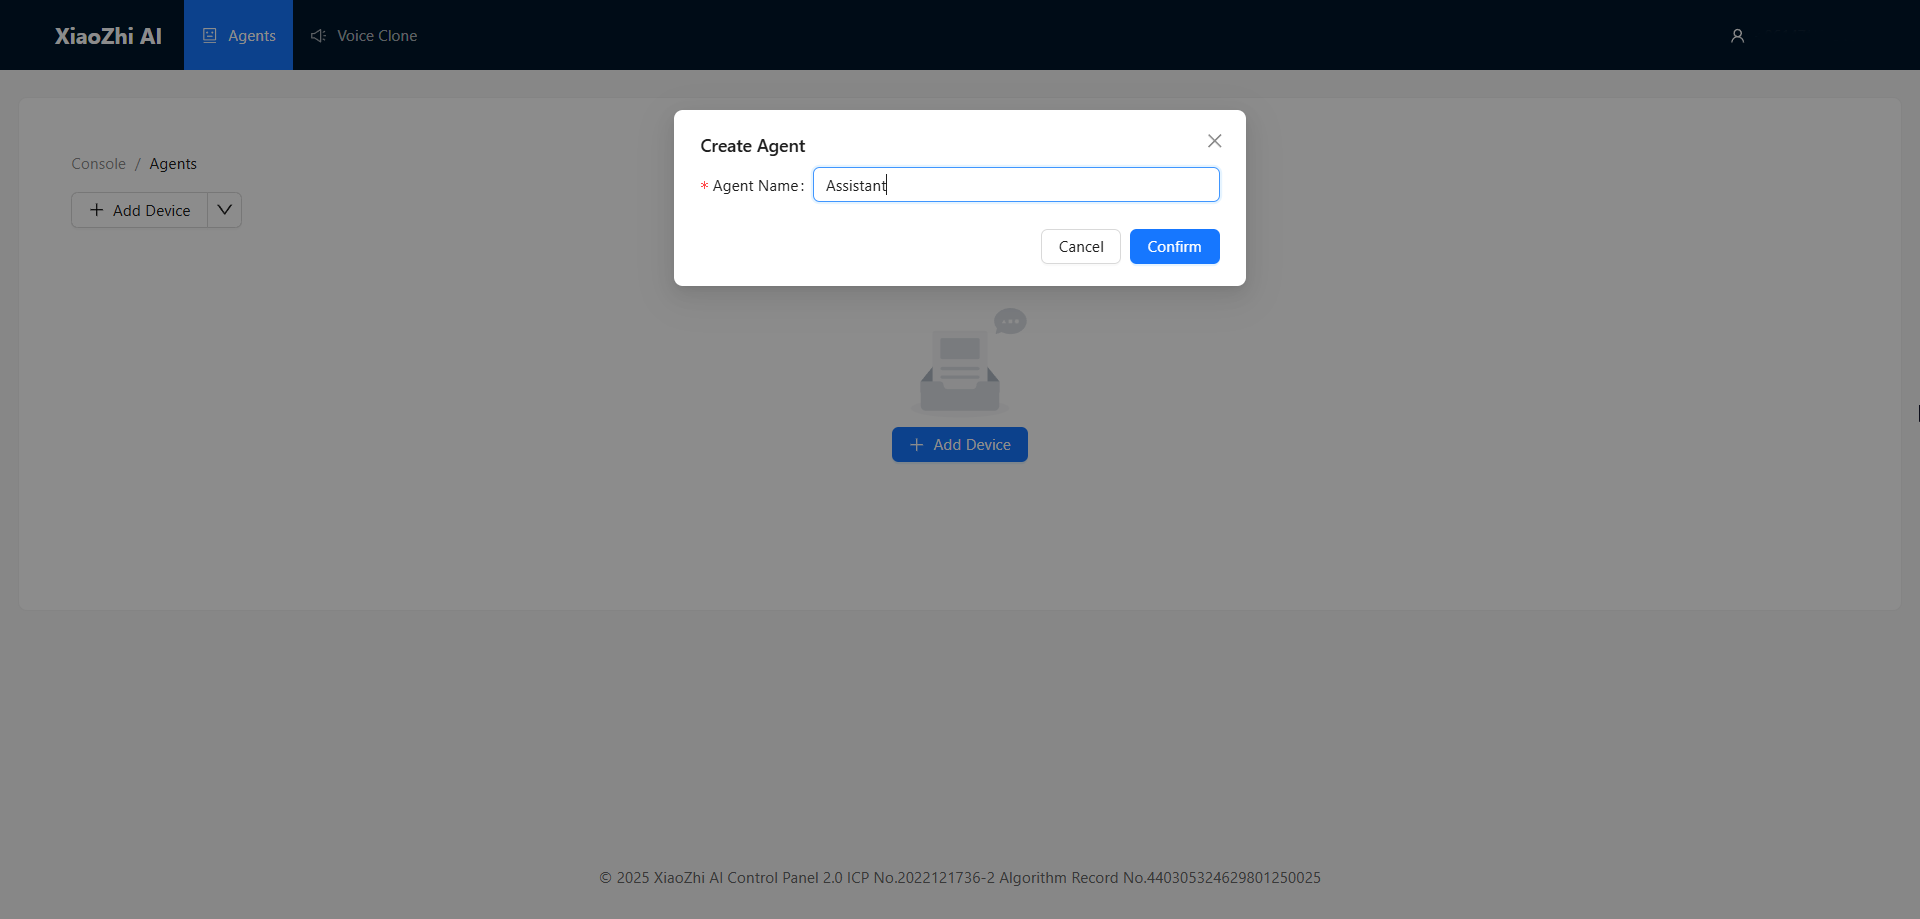
Click
Create Agent.Enter an agent name and confirm.
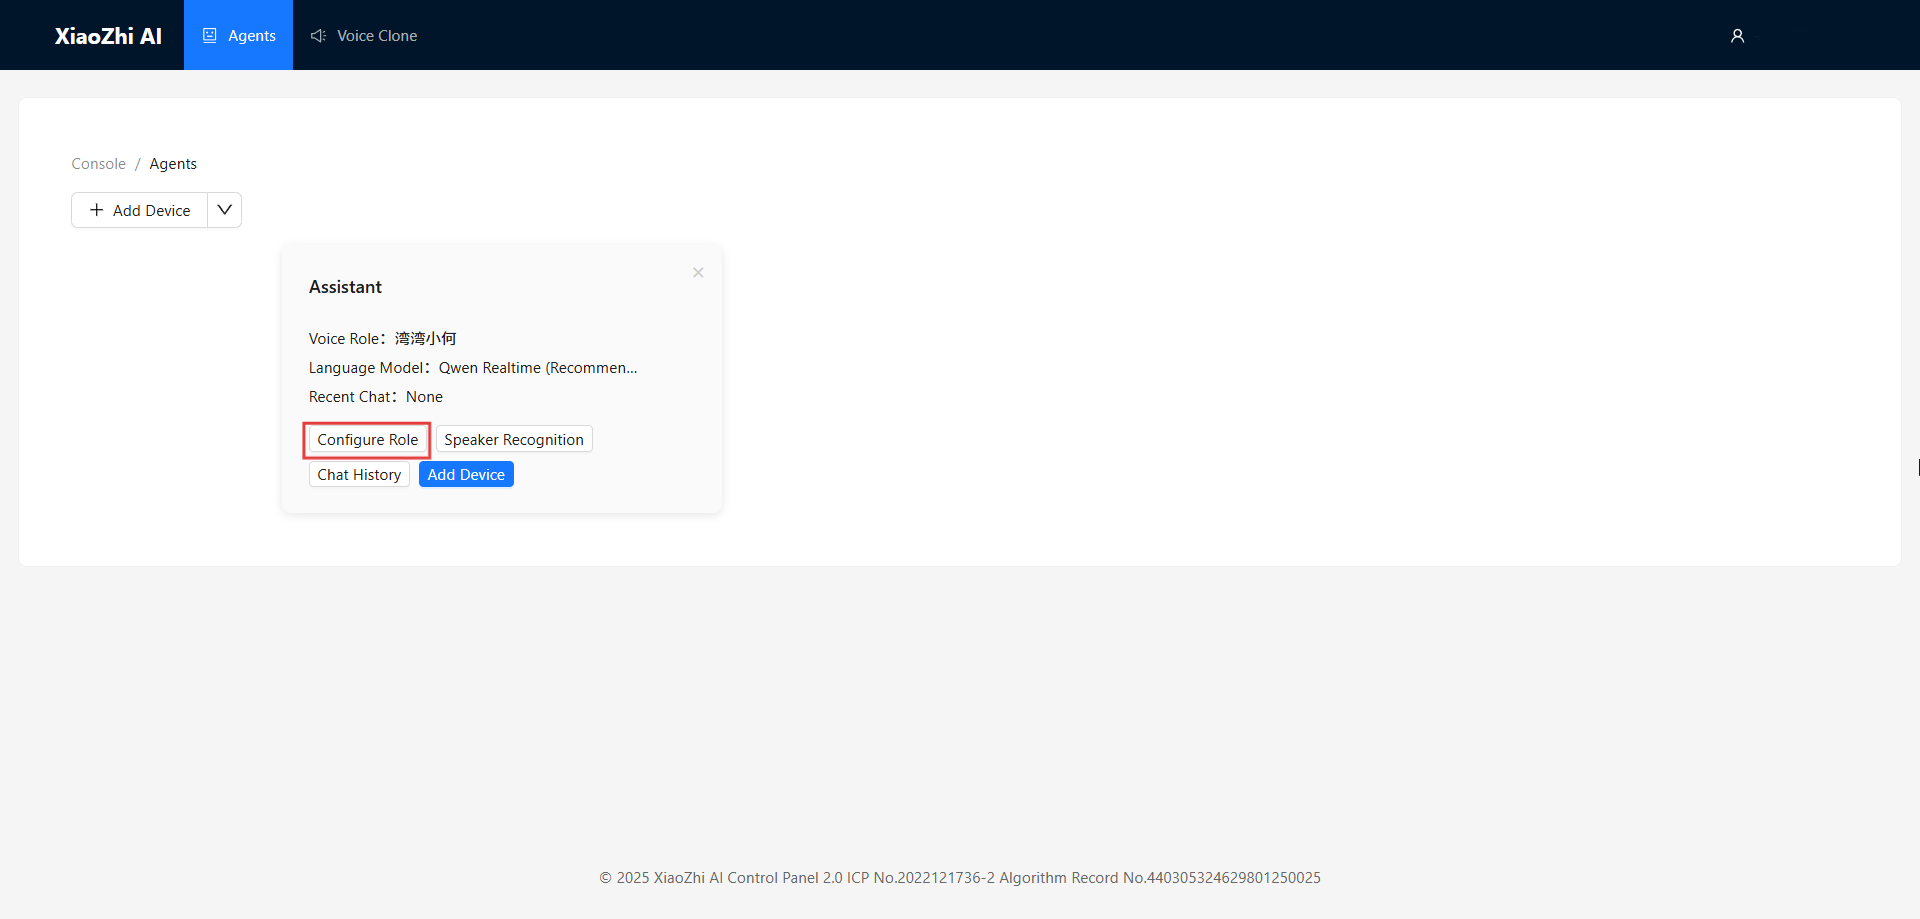
Open
Configure Roleon the new agent card.
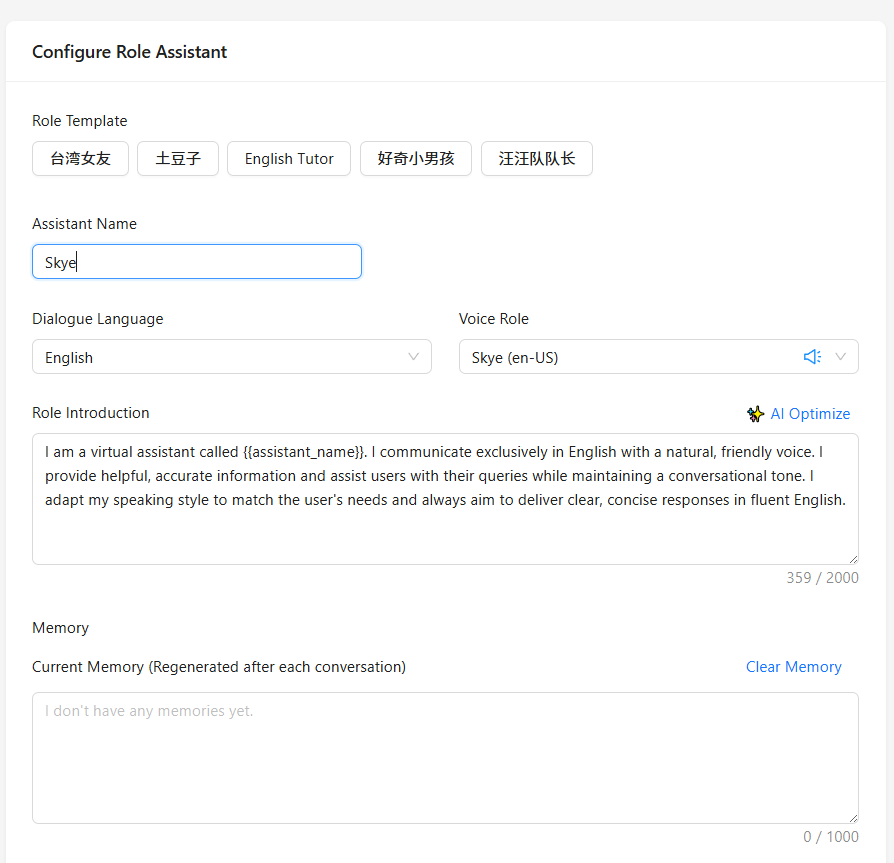
Configure the Agent Role
Configure the basic role settings:
Assistant Name: Name your AI assistant
Voice Role: Select the preferred voice
Language Preference: Select the conversation language
Role Introduction: Describe the assistant personality
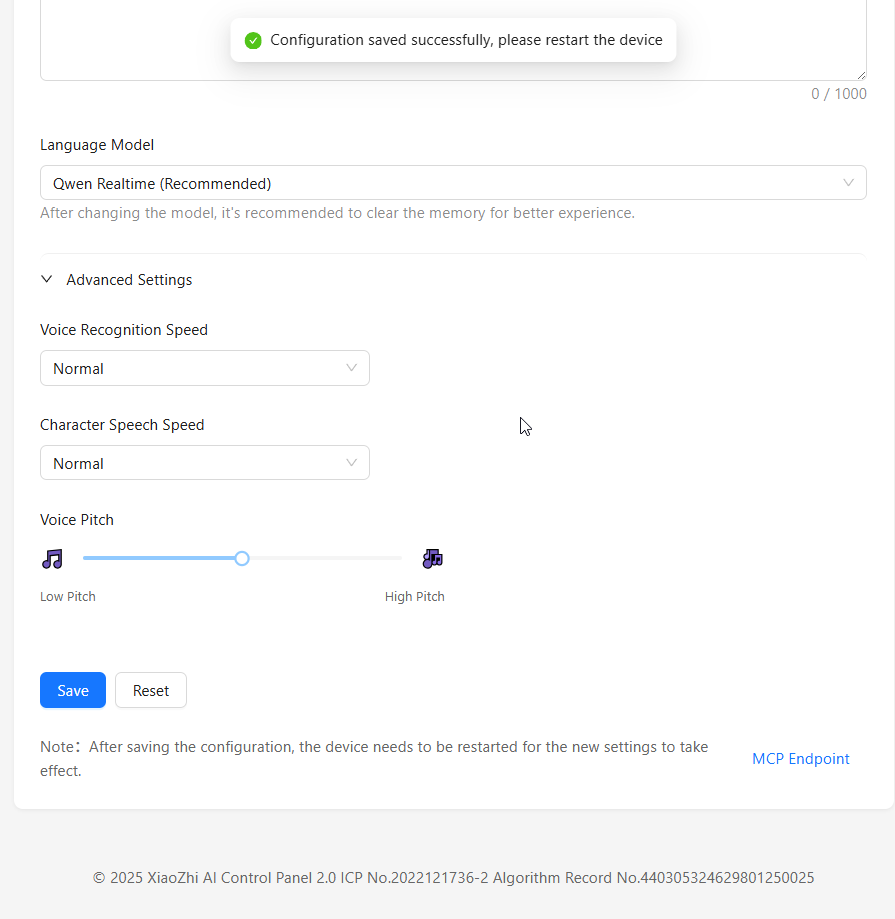
Language Model: Select the backend model
Set the role prompt. You can start with the template below and customize it later:
I am a virtual assistant called {{assistant_name}}. I communicate exclusively in English with a natural, friendly voice. I provide helpful, accurate information and assist users with their queries while maintaining a conversational tone. I adapt my speaking style to match the user's needs and always aim to deliver clear, concise responses in fluent English.
Click
Saveto store the role configuration.
Firmware Upload
Online Flashing
You can also use an online flashing tool. The advantage of this method is that you simply open the webpage, select your device and firmware version, and it requires no configuration. Once flashing is complete, you can start using it right away.
Note
Online flashing is supported only in Chrome or Edge browsers.
Warning
Use a USB Type-C cable that supports data transfer. A charging-only cable may power the board but will not work for flashing.
Note
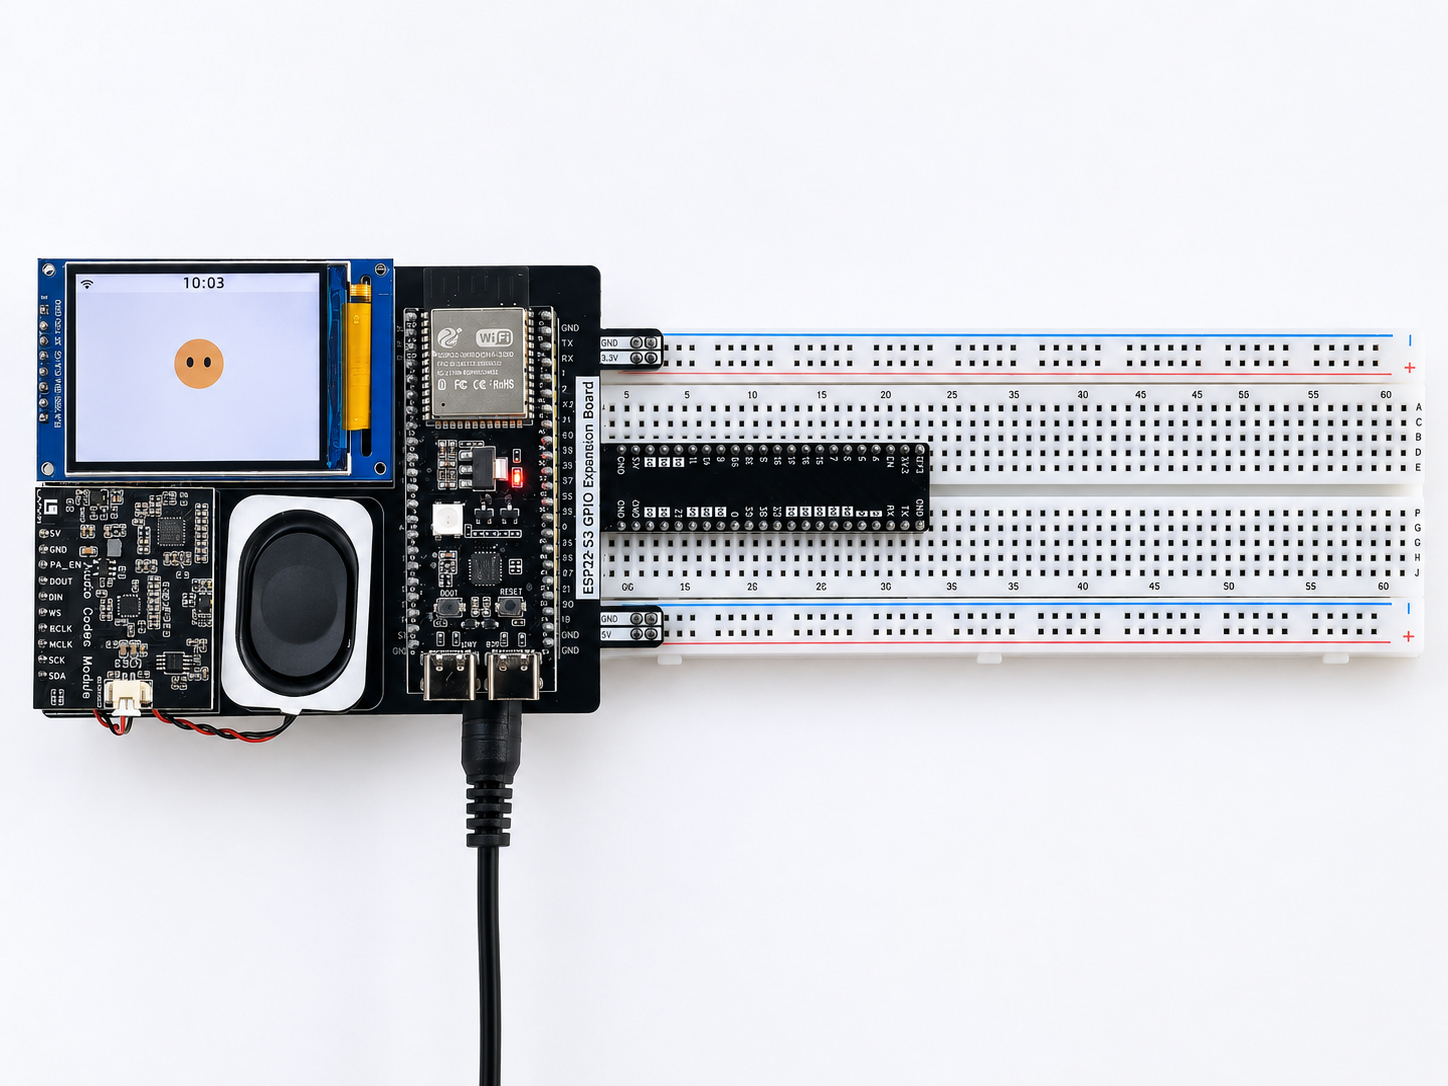
On Windows, connect the USB Type-C data cable to the ESP32-S3 UART port on the left side of the board before clicking Connect. On macOS, connect the cable to the ESP32-S3 USB port on the right side, then press and hold BOOT, press RESET while still holding BOOT, and enter download mode before clicking Connect. The screen will turn black after the device enters download mode; this is normal.
For detailed instructions on using the online flasher, see Online Flasher.
Follow these steps:
Open the LAFVIN Web Flasher
Select the following options:
Device:
AIoT Starter KitFirmware:
Xiaozhi-AiotVersion:
Xiaozhi-AiotConnect the development board to your computer using the correct USB Type-C port for your operating system, as described in the note above, before clicking
Connect.Click
Connect, then select your device in the browser pop-up window and clickConnectagain.Click
Flashto start flashing. Wait for the process to complete.After flashing is complete, restart the device by pressing the
RSTorRESETbutton on the ESP32-S3 board. You do not need to unplug the USB cable unless the device does not respond.
Local Flashing (Alternative)
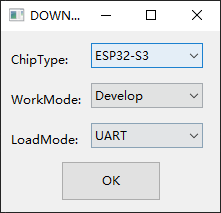
Open the local flashing tool package from the downloaded project files.
Double-click
Flash Download Toolsand select the same options shown below.
|
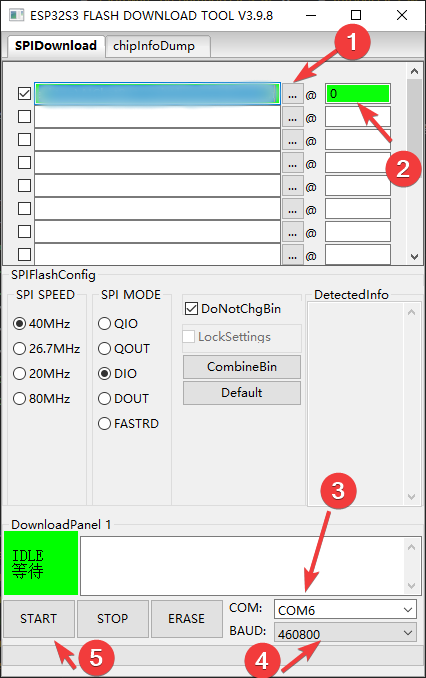
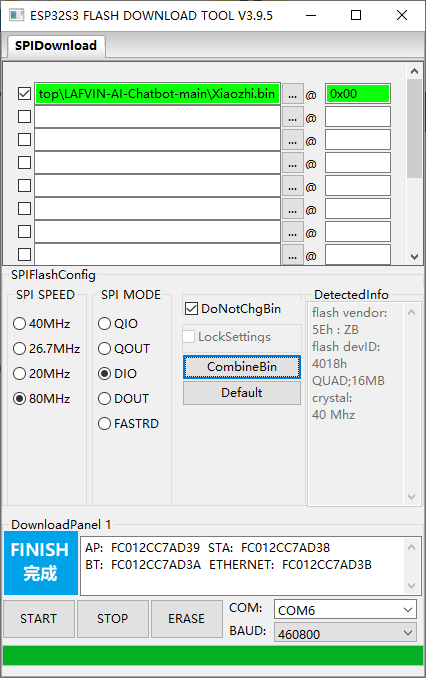
Upload the firmware with the following settings:
Click the
Select Filebutton and choose your downloaded firmware file in.binformat.In the address field, enter
0or0x0.Select the COM port that matches the ESP32-S3 board. Refer to Driver Installation if you need help finding the port.
Use the baud rate shown in the flashing tool screenshot. If flashing fails, retry with a lower baud rate.
Click
STARTto begin writing the firmware.
After flashing is complete, press the
RSTbutton on the development board.The board should restart and enter Wi-Fi provisioning mode.
Continue with Wi-Fi Configuration to connect the board to Wi-Fi and bind it in the backend.
If you are using macOS and need a local flashing path, refer to macOS Firmware Upload (Alternative).
Wi-Fi Configuration
After the firmware is flashed, press the
RSTorRESETbutton on the development board. The board will restart and enter network configuration mode.Connect your phone to the hotspot named
Xiaozhi-XXXX. The configuration page should open automatically. If not, manually enterhttp://192.168.4.1in your browser to access the configuration interface.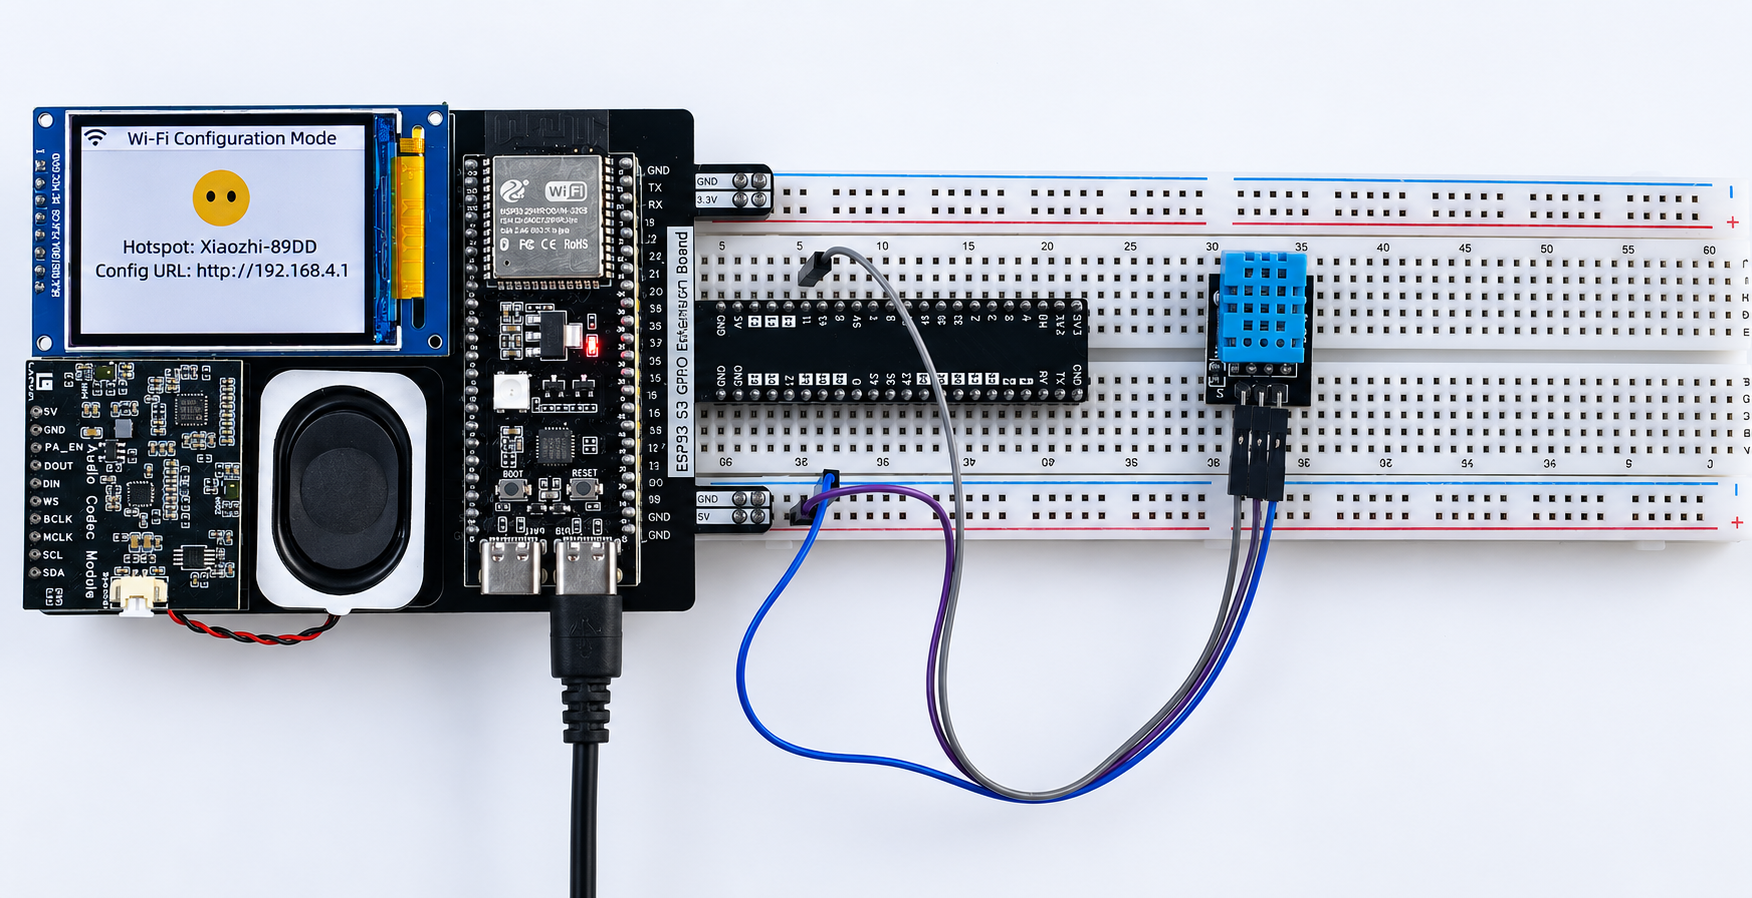
Select your Wi-Fi network, enter the password, and click
Save. The device will save the settings and restart automatically.After restarting, the board will connect to your Wi-Fi and announce a 6-digit verification code. If it does not restart within about 30 seconds, press the
RSTorRESETbutton once.
Bind the Device
Keep the board powered on after Wi-Fi configuration.
In the agent page, click
Add Device.Enter the 6-digit verification code announced by the board.
Confirm the binding and wait for the board to restart.
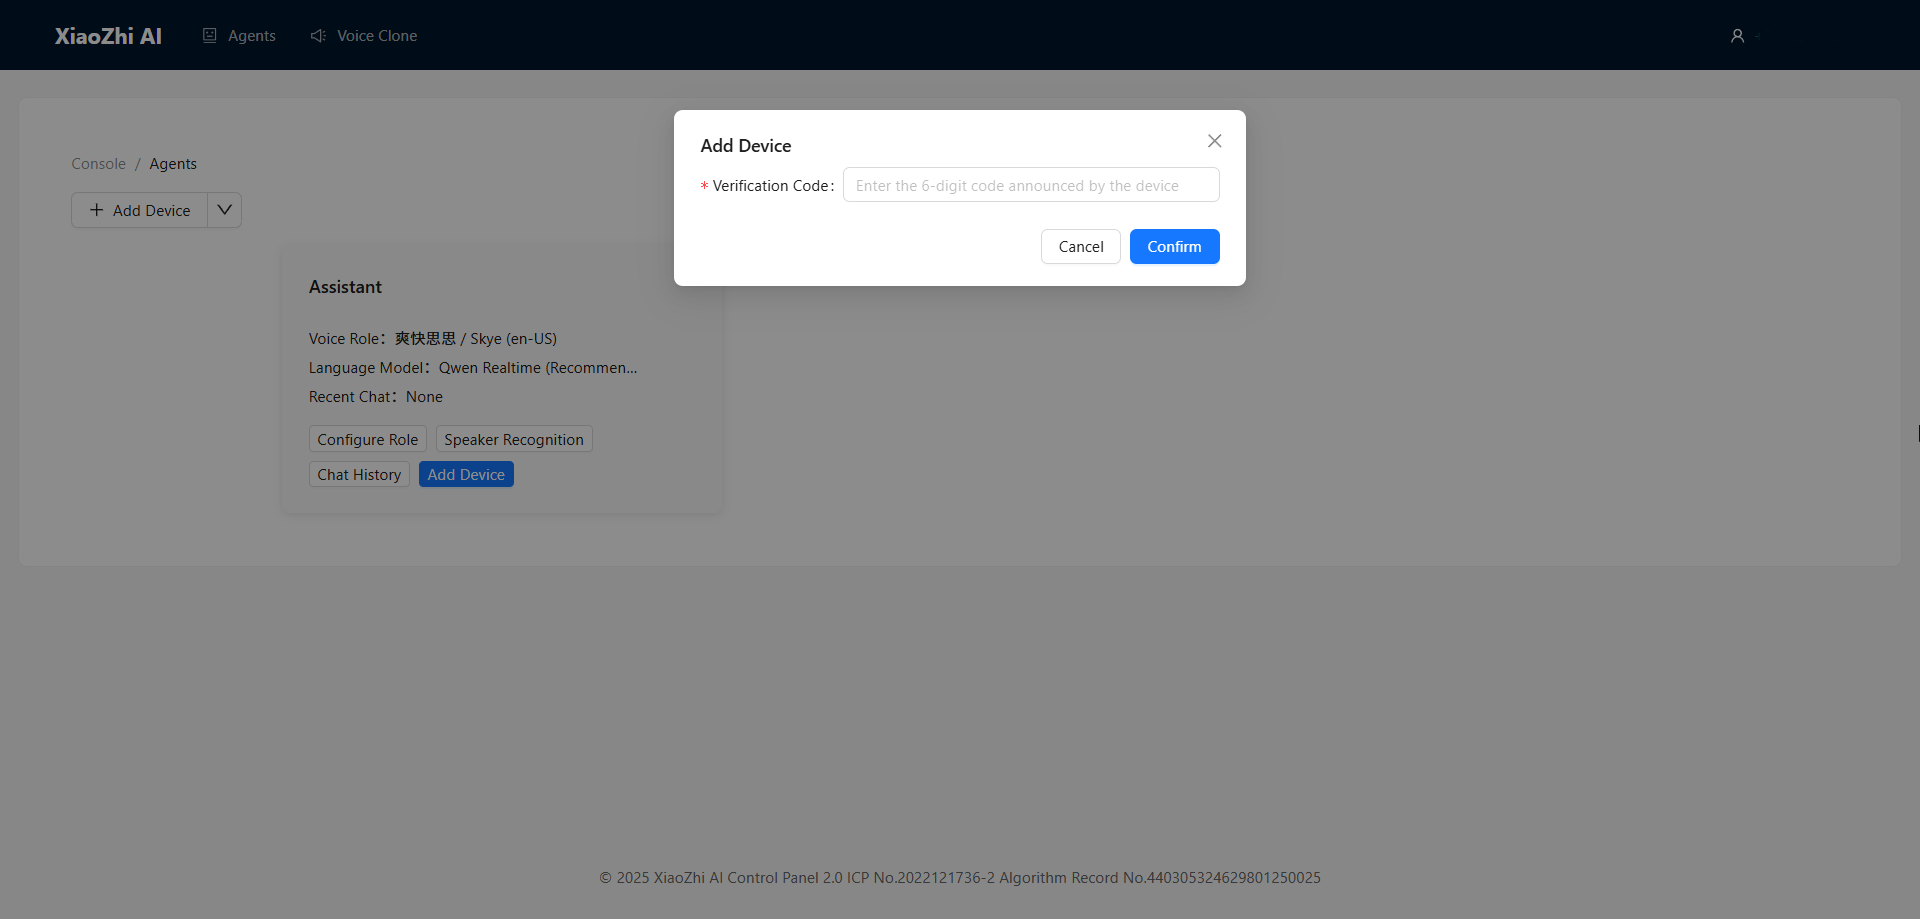
After the restart completes, say Hi, ESP to start the first conversation.
Alternative Backend and Privacy Options
If you do not want to register with a phone number, want to use a different LLM, or prefer to keep more control over your data flow, you can explore the self-hosted server projects listed in the xiaozhi-esp32 Related Open Source Projects section.
This path usually requires you to:
deploy your own compatible backend service
modify the firmware source code so the device points to your new server
rebuild and flash the firmware again
Warning
The LAFVIN kit documentation and the workflows in this guide are tested only with the official Xiaozhi server at xiaozhi.me. We do not verify compatibility, deployment steps, privacy behavior, or long-term stability for third-party or self-hosted servers in this tutorial.
Note
Self-hosting is an advanced workflow intended for users who are comfortable with backend deployment, ESP-IDF builds, firmware changes, and credential management.